We’ve had our share of close calls over the years – a week-long power outage during an ice storm, wildfire evacuations just two ridges over, and a flash flood that turned our normally placid creek into a raging torrent. Each time, we learned something new about being prepared. What started as a haphazard collection of flashlights and canned goods has evolved into a thoughtful system that gives our family genuine peace of mind.
Turns out we’re in the minority – less than half of American households have any kind of emergency plan. But preparing doesn’t have to be overwhelming or expensive. We’ve found practical ways to get ready for the unexpected that work whether you live in a downtown apartment or a rural homestead like ours.
Understanding What You’re Preparing For
Our first attempts at emergency prep were pretty scattered. We’d watch news coverage of some disaster and rush out to buy whatever the reporters mentioned people needed. Not exactly a strategic approach!
Now we start by thinking about what’s most likely to happen where we live. Our area gets heavy winter storms, occasional flooding, and the odd tornado warning. Your list might include hurricanes, earthquakes, or extended urban power outages.
Make a quick list of what could realistically happen in your area. This helps focus your efforts on preparations that actually matter for your situation.
We also had to consider our family’s specific needs. Our youngest has asthma, my wife takes daily medication, and we’ve got two very anxious rescue dogs. Your family might include elderly parents, infants, or someone with mobility challenges.
The foundation of good preparedness is knowing both your likely risks and your family’s unique needs. Everything else builds from there.
Family Emergency Planning: Simple But Essential
The most important part of our preparedness system isn’t equipment or supplies – it’s our family plan. It’s just a single printed page that tells everyone what to do if an emergency happens when we’re scattered around town.
Here’s what we’ve included on ours:
Contact Strategy: We listed my sister in North Carolina as our family’s emergency contact. Distance matters – during regional disasters, local calls might not work, but long-distance often still do. Everyone in the family (even the kids) has her number memorized. We’ve also found that text messages often get through when calls won’t.
Meeting Places: We’ve designated two meeting locations – one just outside our home (the big maple tree across the street) for house fires, and another across town (the library parking lot) if our neighborhood is evacuated. Everyone knows how to get to both places on their own if needed.
Evacuation Routes: We’ve mapped out three different ways to leave our area, since the main highway often floods. Your evacuation routes might use public transit if you’re in a city, or rarely-traveled back roads if you’re in a rural setting like us.
Important Documents: We keep copies of our insurance policies, ID cards, and medical information in a waterproof pouch in our emergency kit. This has saved us enormous headaches when we’ve needed to prove identity or medical needs during disruptions.
Here’s the simple printable template we use for our family emergency plan. We’ve made copies for everyone’s wallets, backpacks, and posted one on the refrigerator:
| Family Member | Phone Number | Emergency Contact (Out-of-Area) | Important Medical Info |
|---|---|---|---|
| Parent/Guardian 1: ______ | Cell: ______ Work: ______ | Contact: ______ Phone: ______ | Allergies/Needs: ______________ |
| Parent/Guardian 2: ______ | Cell: ______ Work: ______ | Contact: ______ Phone: ______ | Allergies/Needs: ______________ |
| Child 1: ______ | Cell: ______ (if any) | Contact: (see above) | Allergies/Needs: ______________ |
| Child 2: ______ | Cell: ______ (if any) | Contact: (see above) | Allergies/Needs: ______________ |
| Meeting Spot (Near Home): ______ (Address or landmark) | Meeting Spot (Outside Neighborhood): ______ (Address/town) | Pet Plan: Location for pets or name of pet-friendly friend/shelter: ______ |
This template has been invaluable during our family drills. There’s something about having this information written down in a consistent format that makes it much easier to follow during stressful situations.
The power of this simple plan became clear during a tornado warning last spring. The kids were at school, I was at work, and my wife was at a doctor’s appointment when the sirens went off. Our plan meant everyone knew exactly what to do and who to contact once it was safe. No panic, no confusion.
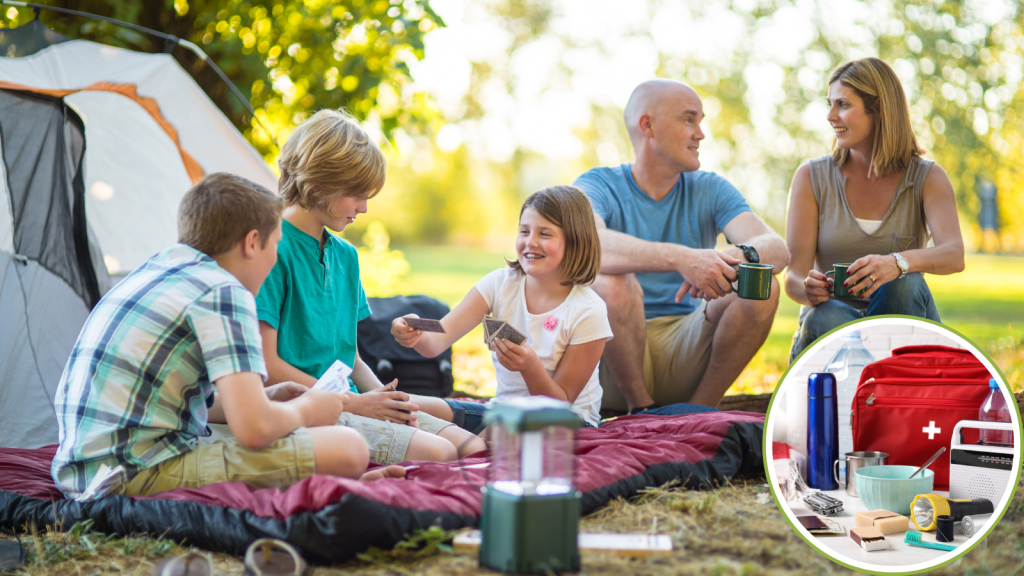
Our 72-Hour Kit: The Go-Bag Approach
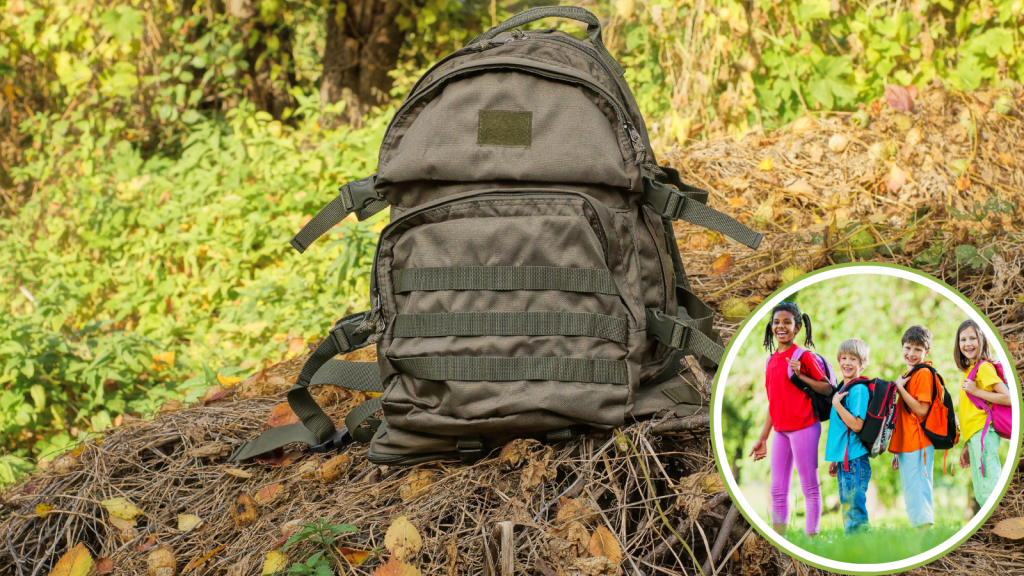
We keep what emergency professionals call a “72-hour kit” or what we simply call our “go-bags” ready for quick evacuation. These aren’t fancy survival kits – just backpacks with essentials that would keep us comfortable for three days away from home.
After several iterations (and one embarrassing evacuation where we brought all our important documents but forgot toothbrushes), here’s what we’ve found most useful to include:
Water: One gallon per person per day is the standard recommendation – that’s heavy! We pack some water bottles and include purification tablets and a small filter to treat additional water if needed. This works better than trying to carry all three days’ worth.
Food: We focus on no-cook, ready-to-eat options. Energy bars, jerky, peanut butter, dried fruits, and nuts take little space and keep well. We choose things our family actually enjoys eating rather than specialized “emergency food” that nobody likes.
Medication and First Aid: We keep a week’s supply of our prescription medications in the kit, rotating them regularly to keep them fresh. Our basic first aid kit includes bandages, antibiotic ointment, pain relievers, allergy medication, and emergency essentials like an EpiPen.
Light and Communication: Headlamps leave your hands free and are more useful than traditional flashlights. We include spare batteries, a hand-crank radio with NOAA weather alerts, and a phone charger power bank. A whistle for each person is a simple way to signal for help.
Comfort and Sanitation: A change of clothes, rain ponchos, emergency blankets, hand sanitizer, wet wipes, toilet paper, and feminine hygiene products keep us comfortable in uncomfortable situations. Don’t underestimate how much these basic comforts can help morale during a stressful time.
Cash and Documents: When power is out, ATMs and card readers don’t work. We keep a stash of small bills and our document pouch with copies of insurance papers, IDs, and medical information.
We store our go-bags near the door for quick access and check them twice yearly (when the clocks change) to replace expired items and update seasonal clothing. The kids have their own smaller backpacks with their essentials and a comfort item or two, like a favorite small stuffed animal.
Water Storage: Our Most Essential Resource
Nothing matters more in an emergency than clean water. We learned this the hard way during a contaminated water situation when a nearby chemical spill affected our well.
The rule of thumb is one gallon per person per day, covering both drinking and basic hygiene. For a family of four, that means 12 gallons for a three-day emergency and 56 gallons for a two-week supply.
Here’s a quick reference chart we keep with our emergency supplies:
| Number of People | 3 Days (Minimum) | 7 Days | 14 Days (Better) |
|---|---|---|---|
| 1 person | 3 gallons | 7 gallons | 14 gallons |
| 2 people | 6 gallons | 14 gallons | 28 gallons |
| 4 people | 12 gallons | 28 gallons | 56 gallons |
| 6 people | 18 gallons | 42 gallons | 84 gallons |
Here’s how we’ve solved the water storage puzzle:
For our home supply, we use a combination of purchased water bottles (which have a long shelf life) and refillable containers. Two-liter soda bottles, thoroughly cleaned and sanitized, work well. We avoid using milk jugs or juice containers since residual sugars can encourage bacterial growth.
We store these throughout the house – some under beds, some on garage shelves, and a few in closets. If space is tight, water storage can be creative – we have a neighbor in a small apartment who uses water blocks as an end table with a tablecloth over them.
For water treatment, we keep unscented regular bleach (8 drops per gallon will disinfect clear water) and know how to boil water when possible (rolling boil for one minute). Our portable water filters are perfect for go-bags and complement these methods.
We’ve found that our water heater holds about 40 gallons of drinkable water. To access it during an emergency, turn off the power or gas to the heater first, then open the drain at the bottom (opening a hot water faucet somewhere in the house helps the water flow out).
Food Storage: Practical Pantry Building
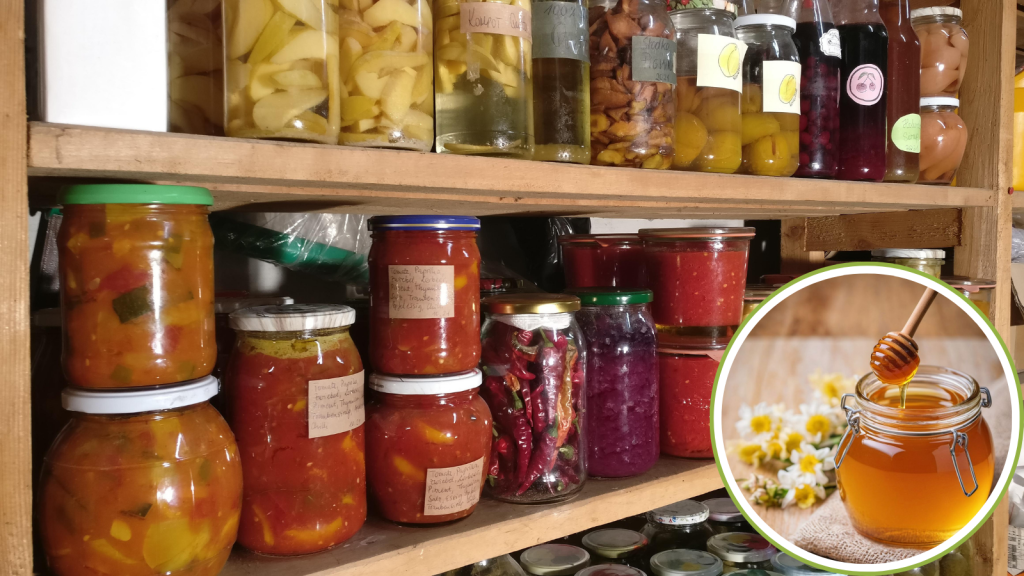
Our emergency food storage isn’t separate from our regular pantry – we’ve just deepened our normal food supplies and organized them for easy rotation.
For short-term emergencies (3-14 days), we focus on:
Canned proteins: Tuna, chicken, beans, and nut butters that can be eaten without cooking if necessary.
Ready-to-eat items: Crackers, cereal, granola bars, dried fruits, and nuts that need no preparation.
Comfort foods: Coffee, chocolate, and shelf-stable treats that boost morale during stressful situations.
Cooking essentials: If cooking is possible, rice, pasta, oats, cooking oil, salt, and spices make basic meals satisfying.
The key to our system is rotation – we use these foods in our everyday cooking and replace them regularly, ensuring nothing expires unused. We simply keep more on hand than a typical household might.
When power fails, we’ve learned to eat from the refrigerator first, then the freezer, and finally our shelf-stable pantry stores. Our camp stove (used ONLY outdoors) and rocket stove made from cinder blocks let us cook when the power is out.
For families with limited space, focus on nutrient-dense, multi-use foods. A jar of peanut butter provides protein, fats, and calories in a compact package and needs no refrigeration. A bag of rice paired with canned beans offers complete protein and keeps almost indefinitely.
Home Readiness: Beyond Stockpiling
Making our home emergency-ready has been as important as gathering supplies. Here’s what’s worked for us:
Safety proofing: We’ve secured tall furniture to wall studs, installed smoke and carbon monoxide detectors on every level, and keep fire extinguishers in the kitchen, garage, and near our woodstove. We also regularly clear our gutters and maintain a defensible space around our rural home for wildfire protection.
Utility management: Everyone in the family (even our teenagers) knows how to shut off the water, electricity, and gas at the main connections. We’ve attached the necessary tools (like a gas shutoff wrench) near the meters for quick access.
Alternative power: Our small generator runs our well pump and refrigerator during outages. We’re careful to run it outside, far from any open windows, to avoid carbon monoxide poisoning. Solar chargers for devices and battery banks for lighting offer safer alternatives for basic needs.
Heating and cooling: Our woodstove has been a lifesaver during winter power outages. For those without this option, designating a single room for heating or cooling conserves resources. Sleeping bags, warm clothing layers, and battery-powered fans help manage temperature extremes.
Sanitation planning: When water service is disrupted, sanitation becomes a challenge. We keep large trash bags and a portable toilet seat for emergency bathroom needs, along with lime or kitty litter to control odors.
For apartment dwellers, many of these same principles apply, though solutions might look different. A battery-powered carbon monoxide detector, strategies for apartment evacuation, and cooperation with neighbors can overcome the unique challenges of urban emergency preparedness.
Evacuation Readiness: When Staying Isn’t Safe
Our area has faced two evacuation warnings in the past five years. The first time was chaotic – the second time went smoothly because we’d learned from experience and prepared properly.
Here’s what we’ve put in place for efficient evacuations:
Early warning systems: We’ve signed up for local emergency alerts and keep a weather radio nearby. Being among the first to know about evolving situations gives precious preparation time.
Mapped routes: We’ve identified three separate routes out of our area, including back roads that might not be on standard GPS routing. Physical maps stored in our vehicles don’t depend on cell service or power.
Transportation readiness: We keep our vehicles’ gas tanks at least half-full at all times, especially during storm or fire season. Our emergency kits live near the door where we can grab them quickly.
Prioritized valuables: We’ve created a short list of irreplaceable items to take if time allows (beyond essential go-bags): the external hard drive with family photos, our wedding album, and a small box of family heirlooms. Everything is stored together for quick retrieval.
Pet evacuation plan: Our dogs’ leashes, carriers, food, and medications are stored with our emergency supplies. We’ve identified pet-friendly evacuation locations in advance, since many shelters don’t accept animals.
The most important evacuation lesson we’ve learned? Leave early. Nothing in our home is worth risking our lives. Items can be replaced; people cannot.
For our go-bags, we’ve developed this checklist that we use when we conduct our twice-yearly inventory:
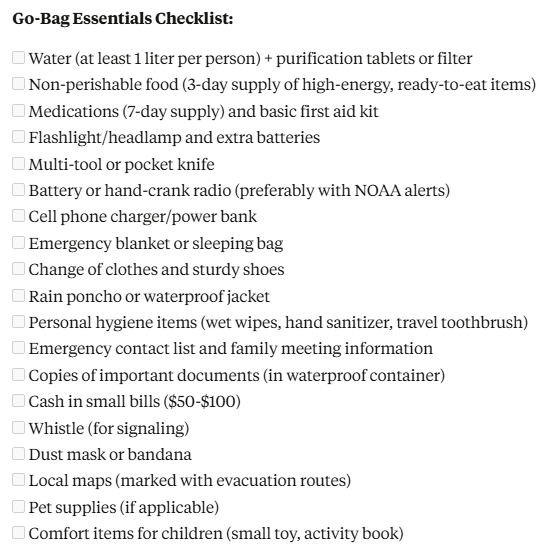
We laminated this list and keep it with our emergency supplies so we can quickly check that everything is ready to go.
Urban, Suburban, and Rural Preparedness Differences
Our family has lived in all three settings over the years, and we’ve had to adapt our approach each time. Here’s what we’ve learned works best in different environments:
For City Apartments:
Space-maximizing storage: When we lived in a small urban apartment, we stored water under beds, used vacuum bags for emergency clothing, and chose compact multi-purpose tools rather than specialized equipment.
Vertical evacuation planning: For high-rise dwellers, planning for stair evacuation when elevators aren’t working is crucial. Consider lighter go-bags that can be carried down many flights of stairs.
Community resource knowledge: Cities often have designated emergency shelters, water distribution points, and cooling centers. Knowing their locations beforehand saves precious time during crises.
Urban-specific concerns: In our city days, we planned for unique urban challenges like lengthy power restoration times for apartment buildings and possible water disruption to upper floors when pumps fail.
For Suburban Homes:
Neighborhood networks: Our suburban neighborhood created an informal emergency contact system where neighbors checked on each other during storms. This community approach multiplies everyone’s safety.
Landscape management: When we had a suburban yard, we maintained trees and drainage to prevent damage during storms. Strategic planting and regular maintenance reduced our risk significantly.
School emergency coordination: With schools nearby, we ensured our family plan aligned with school emergency procedures. Knowing exactly who would pick up children and from where prevented confusion.
For Rural Properties:
Self-sufficiency focus: Now that we’re rural, our preparations emphasize longer periods of self-reliance. We keep more supplies, maintain multiple water sources, and have more extensive first aid capabilities.
Distance calculations: With emergency services 30 minutes away, we’ve adjusted our first aid training and supplies to handle situations longer on our own.
Equipment redundancy: We’ve found that having backup methods for crucial systems is essential – alternative heat sources, multiple water filtration methods, and communication redundancies.
Property management: We maintain fire breaks, have tools for clearing fallen trees, and keep essential equipment well-maintained and ready for immediate use.
Regardless of location, the core principles remain the same: know your risks, make a plan, prepare supplies, and develop necessary skills.
Building Skills and Practice: The Overlooked Essential
The supplies we’ve gathered would be far less useful without the knowledge to use them properly. These are the skills and practices we’ve found most valuable:
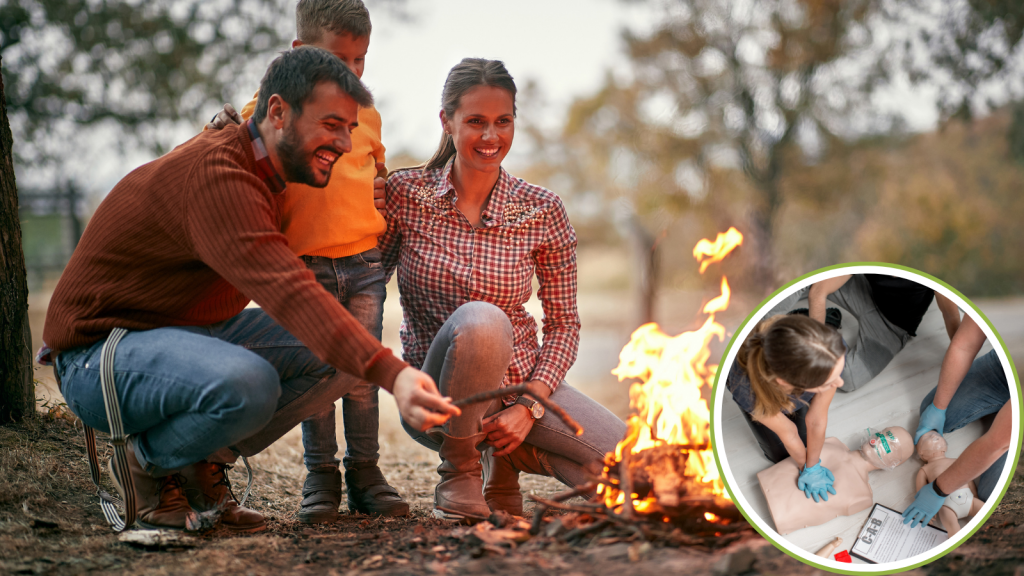
First aid training: Everyone in our family over age 12 has taken a basic first aid and CPR course. This knowledge has already come in handy for everyday minor emergencies.
Regular drills: Twice yearly, we practice our evacuation plan, timing how quickly we can gather our go-bags and meet at our designated spot. The first time took nearly 15 minutes; now we’re down to under 5.
Equipment familiarity: When we got our generator, we practiced setting it up several times before we actually needed it. This prevented the frustration of learning under pressure.
Food preparation practice: During routine camping trips, we practice cooking the same types of foods we’ve stored for emergencies, using our alternative cooking methods.
Stress management: Perhaps the most underrated emergency skill is the ability to stay calm and think clearly. We practice deep breathing and have established simple decision-making frameworks the whole family understands.
Supply rotation system: We regularly use and replace our stored food and check expiration dates on medications and batteries when we change our clocks for daylight saving time.
These skills don’t require expensive courses or special equipment – just intentional practice and awareness.
Keeping Preparedness Positive: Our Family Approach
We’ve worked hard to make emergency preparedness a normal, positive part of family life rather than a source of anxiety. Here’s our approach:
Focus on empowerment: We frame preparedness as something that gives us choices and control, not as protection from scary scenarios. Our kids know that being prepared helps us help others too.
Start small and build: We began with just a basic three-day supply and a simple plan. Over time, we’ve expanded our preparations without feeling overwhelmed by trying to do everything at once.
Integrate with normal life: Most of our preparedness activities are just extensions of regular household management – keeping a deeper pantry, maintaining our home systems properly, and staying informed about local conditions.
Celebrate resilience: When we’ve successfully navigated challenges (like cooking for a week during a power outage), we acknowledge our family’s adaptability and problem-solving abilities.
Share with community: We’ve organized casual neighborhood get-togethers where emergency preparedness is discussed alongside other community topics. This normalizes the subject and builds stronger community connections.
Emergency preparedness isn’t about fear or pessimism – it’s about practical optimism. We hope for the best while being ready for challenges. This balance gives our family confidence to face uncertain situations.
Getting Started: First Steps Anyone Can Take
If you’re just beginning your preparedness journey, here are the simple first steps we recommend:
- Create a basic plan: Write down how family members will contact each other and where you’ll meet in various scenarios. Put a copy in wallets and backpacks.
- Store water: Start with just a three-day supply (one gallon per person per day) using clean containers you already have.
- Deepen your pantry: Add a few extra shelf-stable items to your grocery list each week until you have a two-week buffer of foods your family normally eats.
- Gather essentials: Collect flashlights, batteries, a first aid kit, and medications in one accessible place.
- Address specific needs: Make provisions for pets, medical requirements, or other unique family needs.
- Practice your plan: Run through what you’d do in common emergency scenarios so they become familiar routines.
- Learn a skill: Take a first aid class, learn to purify water, or practice using a map and compass.
These steps require minimal expense but provide significant peace of mind. As your comfort and resources allow, you can build on this foundation.
Emergency preparedness is like tending a garden – it requires regular attention and seasonal adjustments, but the results are well worth the effort. Our family sleeps better knowing we’ve taken these practical steps to protect ourselves and help our community when challenges arise.
What began as a reaction to scary news headlines has become a positive family practice that’s already served us well through storms, power outages, and evacuations. The peace of mind we’ve gained has been worth every minute spent preparing.
References/Resources
- FEMA Preparedness Survey
- Red Cross Poll on Disaster Readiness
- Ready.gov Make A Plan
- Ready.gov Build A Kit
- CDC Emergency Water Supply Guide
- Red Cross Survival Kit Supplies
- Morning Chores Disaster Preparedness for Homesteaders
- MIRA Safety Urban vs Rural Preparedness Guide

James is a former logistics coordinator and wilderness safety instructor, whose practical experience taught him the value of sensible preparedness and calm resilience. Passionate about self-reliance, James teaches everyday skills—like water purification, emergency communication, and outdoor safety—to help people confidently handle life's disruptions without fear or overwhelm. His approachable style combines real-world insights with relatable, personal stories and experiences.