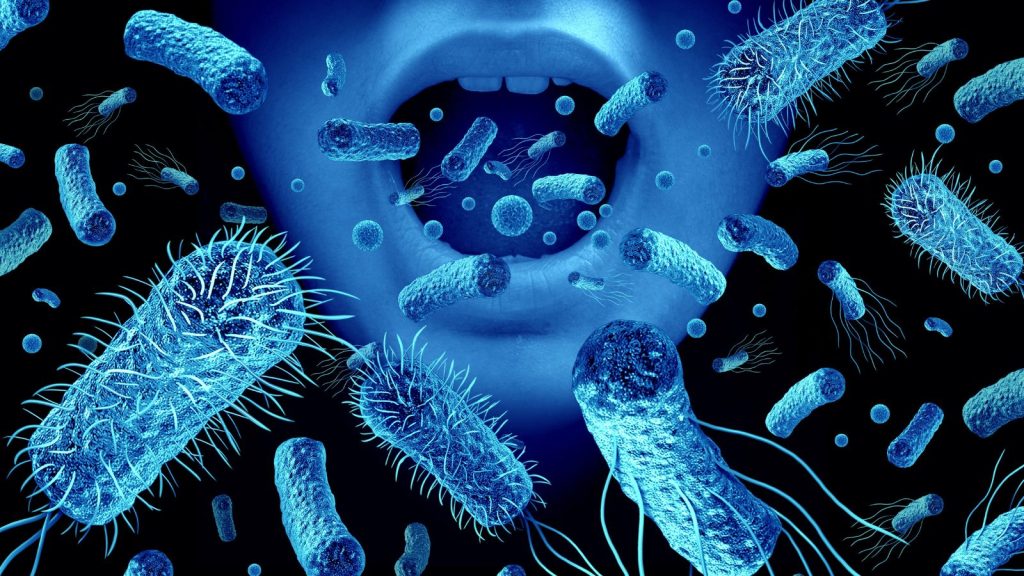
Foodborne illnesses – sicknesses caused by eating food contaminated with harmful bacteria, viruses, or toxins – affect millions of people each year. In normal times we rely on refrigeration, proper cooking, and food regulations to keep our meals safe. But during emergencies or when storing food long-term, these safeguards can break down. Power outages, lack of clean water, and reliance on stockpiled food all increase the risk of foodborne illness if we aren’t careful. The Centers for Disease Control and Prevention (CDC) estimates that each year about 48 million people in the U.S. (roughly 1 in 6) get sick from contaminated food, leading to 128,000 hospitalizations and 3,000 deaths.
Understanding Foodborne Illness Risks in Emergencies
During an emergency, the risk of foodborne illness can rise sharply. Foodborne illness (often called “food poisoning”) happens when we consume foods or drinks contaminated with harmful bacteria, parasites, viruses, or the toxins they produce. Common symptoms include nausea, vomiting, diarrhea, and fever – and in severe cases, hospitalization or even death.
In normal daily life, we control these risks with refrigeration, cooking, and cleanliness. However, disasters like storms, floods, and power outages can disrupt those safety measures. For example, if the electricity goes out for an extended time, refrigerators and freezers can no longer keep foods at safe temperatures. Perishable foods in a refrigerator start to become unsafe after about 4 hours without power (if the door stays closed), and a full freezer stays cold only about 48 hours (24 hours if half-full) before thawing.
Emergencies can also lead to situations where clean water is scarce and sanitation is poor, raising contamination risk. After a flood, for instance, foods that touched floodwater or dirty hands can carry dangerous germs. In disaster scenarios, people might be forced to eat whatever food is available, even if it’s expired or wasn’t stored properly, simply because they have no alternative.
It’s helpful to remember that foodborne illness is widespread but preventable. The causes of foodborne illness in emergencies often come down to temperature abuse (foods held too long in warm conditions), contaminated water (used in cooking or cleaning), or improper food preservation techniques.
General Best Practices for Safe Emergency Food Storage
Whether you’re stockpiling food for a disaster or storing your homestead harvest, certain basic rules of food storage will keep your supplies safe and fresh longer. The key factors are temperature, moisture, light, and hygiene. Experts consistently recommend storing foods in a cool, dry, dark place for the longest shelf life.
Keep Storage Areas Cool
Ideally, store emergency food at 40°F to 70°F (4–21°C). The lower end (around 40–60°F) is best for long-term storage, though in most homes that might be a cool basement or root cellar. Try to stay below 85°F at maximum. Heat speeds up spoilage – for example, canned food held at 95°F will spoil much faster than if held at 65°F. Never store food next to stoves, water heaters, or in direct sunlight where heat is high.
Keep it Dry
Dry conditions are vital for food storage. Humidity can cause cans to rust and dry foods to mold. Store food off the damp ground or concrete; use shelves or pallets. Avoid areas like a damp garage or under sink where moisture is common. For foods in cardboard or paper packaging (like cereal or pasta boxes), it’s wise to put them in airtight plastic bins or Mylar bags because those packages are not moisture-proof.
Use Airtight, Pest-proof Containers
Rodents and insects would love to chew into your emergency stash, so make it hard for them. Store foods in airtight, rodent-resistant containers. Sturdy food-grade plastic buckets with tight lids, glass jars with lids, or metal cans are good options. For example, many preppers pour bags of rice or flour into 5-gallon plastic buckets with gasketed lids. This not only keeps moisture out, it also prevents pests like grain weevils or mice from getting in.
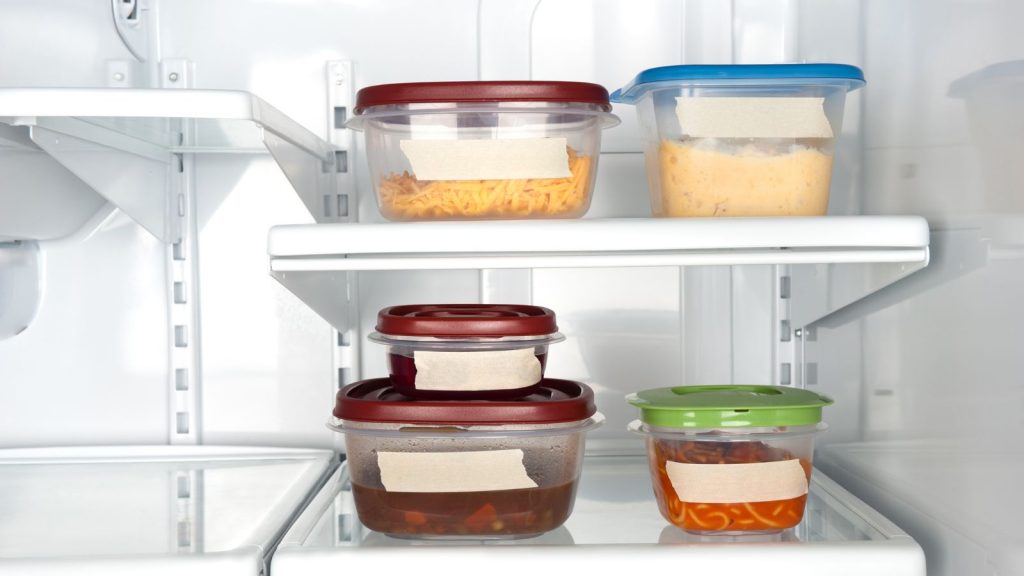
Practice FIFO (First In, First Out)
Rotation is key to making sure your stored food stays fresh. Label items with the date you stored them (or the best-by date if available) and organize so that the oldest items will be used first. Periodically inspect and rotate your stockpile – use up items that are older and replace them with new ones.
Store Away from Chemicals and Gasoline
Do not keep your food supply near things like gasoline, kerosene, pesticides, or cleaning chemicals. Many foods (especially grains) can absorb odors or even chemical vapors. For instance, storing flour next to gasoline cans in a garage could make it smell/taste like fuel.
Know Shelf Lives and Dates
Most shelf-stable foods can last a long time, but be aware of the difference between quality dates and safety. Many packages have “best by” dates which relate to quality, not that the food instantly spoils after that date. According to the USDA, most shelf-stable foods are safe indefinitely as long as the packaging is intact. For example, canned goods will last for years (even beyond the date on the can) if the can isn’t rusted, dented, or swollen.
Storing Canned Foods Safely
Canned foods are a mainstay of emergency food supplies. They are commercially sterilized and sealed, making them very stable. But even canned goods require proper storage and handling to ensure they remain safe.
Shelf Life and Storage Conditions
Commercially canned foods (soups, vegetables, meats, etc.) can last for years or even indefinitely in terms of safety, as long as the can remains in good condition. The food inside is vacuum-sealed and was heated during canning to kill bacteria, so under normal circumstances it won’t spoil. However, quality (flavor, texture, color) will slowly degrade over time.
To preserve canned food best, follow the golden rules: cool, dry, and stable temperature. Heat is particularly bad for cans. “Store canned foods in a cool, dry place… Temperatures below 85°F are best,” advises the USDA Food Safety and Inspection Service. Avoid storing cans near stoves or heating vents, in direct sun, or in uninsulated attics where temps can exceed 100°F.
Handling Cans
When adding canned foods to your pantry, check the cans’ condition. Don’t purchase or keep any cans that are bulging, badly dented, leaking, or rusted. A dent on a seam or lid can let bacteria in. Likewise, if a can is rusty such that you can’t wipe the rust off, it could have tiny holes. It’s best to discard heavily rusted cans.
Warning Signs and Spoilage
While rare, canned foods can harbor deadly bacteria if something went wrong in processing or if the can’s seal is broken. The biggest concern is Clostridium botulinum, the bacterium that causes botulism, which thrives in sealed, airless environments like a jar or can. You cannot see or smell the botulinum toxin, so you must rely on indirect signs.
Never use food from cans or jars that show possible botulism warnings: leaking, bulging, or badly dented cans; cracked jars or jars with loose or bulging lids; any canned food that has a foul, “off” odor; milky or slimy liquid inside; or any container that spurts liquid or foam when opened. These signs strongly indicate spoilage, and such food should be discarded immediately. Do not even taste it!
Storing Dry Goods (Grains, Beans, and Pasta)
Dry goods like grains, dried beans, pasta, flour, sugar, and cereals are the backbone of many long-term food storage plans. These foods are low in moisture, which means they don’t spoil easily – they’re not a friendly environment for bacteria as long as they stay dry.
Keep Them Bone Dry and Cool
Just like with canned foods, cool and dry storage is ideal. For grains, beans, flour, and similar items, too much moisture is the biggest threat because it can lead to mold growth or allow bacteria to grow. Ensure these items are in moisture-proof containers. Original packaging like paper or thin plastic is often not good enough for long-term storage – consider transferring to airtight canisters, jars, or buckets.
Watch Out for Pests
Dry goods are prone to insect pests such as weevils, pantry moths, and beetles. These tiny bugs often hitchhike in from the store (eggs in flour, for example) and then hatch in your pantry. To prevent an infestation, you have a few tools: (1) Freezing – if you buy large bags of rice, flour, or other grains, you can freeze them for a few days when you get them home. Freezing kills any insect eggs present. (2) Oxygen deprivation – using oxygen absorber packets in sealed containers will suffocate insects and eggs. (3) Bay leaves or natural repellents – some people place bay leaves or diatomaceous earth in stored grain as a mild deterrent.
Shelf Life of Common Dry Goods
Many dry staples can last a very long time if kept dry and pest-free. For instance, white rice and dried beans have been known to remain edible for 25-30 years in sealed #10 cans or buckets in ideal conditions. The U.S. Department of Agriculture notes that milled white rice keeps far longer in storage than brown rice. That’s because brown rice contains oil in the bran layer that can become rancid over time.
As a rule, whole grains or products with higher fat (like brown rice, whole wheat flour, granola, or nuts) will spoil sooner than refined products. Brown rice might start to taste off after 6-12 months at room temperature, whereas white rice is still fine. Whole wheat flour might last only a few months before the oils make it smell “paint-like,” while white flour can easily last a couple of years if kept dry.
Freeze-Dried and Dehydrated Foods
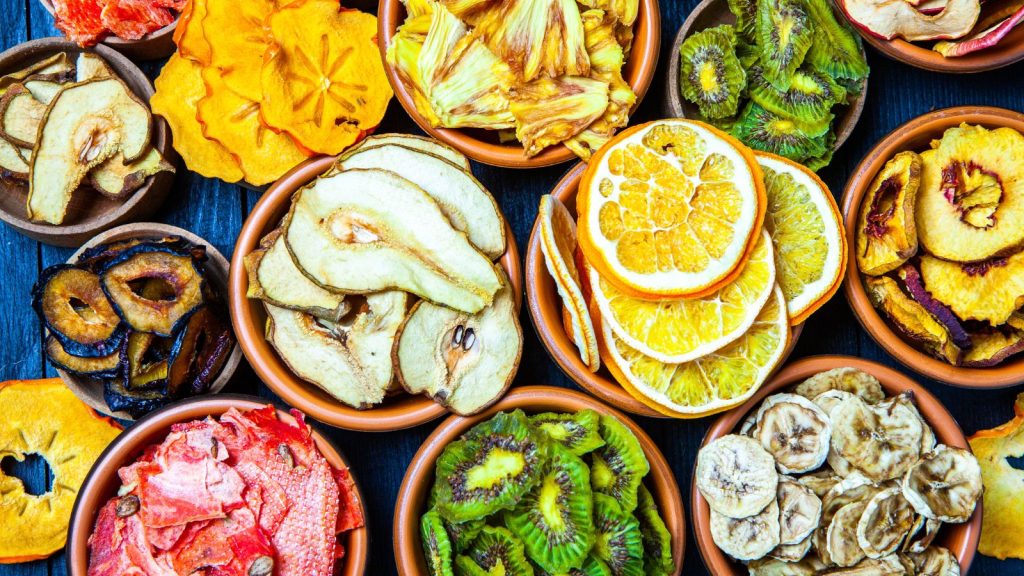
Freeze-dried and dehydrated foods are popular for emergency preparedness because they are lightweight, compact, and can last a very long time on the shelf. You’ll often see companies advertising freeze-dried meals with a “25-year shelf life.”
What Are They?
Dehydrated foods have had most of their water removed by drying with heat (like dried fruits, beef jerky, or pasta which is basically a dried product). Freeze-dried foods are made by freezing the food and then removing the water under vacuum (sublimation), which preserves taste and texture better than regular drying.
Both methods result in foods that won’t support bacterial growth because they have so little moisture. For example, freezing and drying can stop bacteria from growing, but importantly, it doesn’t always kill them. That means if a food had bacteria before drying (say raw meat that gets freeze-dried), those bacteria could “wake up” and multiply once water is added back, unless you cook the food after rehydrating.
Shelf Life
These products are known for longevity. University research confirms that commercially prepared freeze-dried foods can have a shelf life of up to 25 years when stored properly! Dehydrated foods also last a long time, though generally a bit less (several years) because they retain a little more residual moisture than freeze-dried.
The key to reaching those impressive shelf lives is proper packaging and storage. Freeze-dried emergency foods are usually sealed in airtight Mylar pouches or cans with oxygen absorbers included, to prevent spoilage. As long as that seal remains intact and they’re kept in a cool, dry place, they should retain quality for decades.
Storage Conditions
Treat freeze-dried and dehydrated foods similarly to other dry goods – keep them cool, dry, and protected from air. If you’re packaging your own dehydrated foods at home (say you dried apple slices or made jerky), be sure they are fully dried to a safe level and then store them in airtight containers. Using a vacuum sealer or oxygen absorbers can greatly extend their shelf life. Moisture is the enemy – even humidity in the air can make dried foods spoil.
Home-Canned Foods and Botulism Risk
Many homesteaders and preppers take food preservation into their own hands by home canning fruits, vegetables, and meats. Home canning is a fantastic way to create shelf-stable food from your garden or farm – but it’s also an area where special precautions are absolutely critical. This is because improperly canned foods can lead to botulism, one of the most severe forms of food poisoning.
Understanding the Risk
Clostridium botulinum bacteria are present in soil and can easily end up on vegetables or meats. In normal conditions, they are harmless because they can’t grow with oxygen around. But in a sealed jar of canned food, if the food isn’t acidic enough and hasn’t been heated sufficiently to kill the bacteria, those botulinum spores can activate. They produce a toxin that leads to botulism – a disease that can cause paralysis or death.
It’s very rare, but when it happens it’s often from home-canned foods. Between 1999 and 2008, 91% of botulism outbreaks in the U.S. that were linked to food were from home-canned goods – a testament to how important proper canning methods are.
Safe Canning Practices
To can foods at home safely, always follow scientifically tested recipes and methods (such as those from the USDA Complete Guide to Home Canning or the National Center for Home Food Preservation). The core rule is: Low-acid foods (like vegetables, meats, beans, and most mixtures) must be processed in a pressure canner, not a boiling water bath. The pressure canner reaches the 240°F (116°C) needed to destroy C. botulinum spores.
High-acid foods (like pickles, jam, fruits, or anything with lots of added vinegar) can be water-bath canned because botulism can’t grow in a sufficiently acidic environment. If you’re new to canning, take time to learn and follow modern guidelines – using the right jars, proper seals, and correct processing times for your altitude.
Shelf Life of Home-canned Foods
Quality is best if used within a year. After a year or two, home-canned goods may begin to discolor or lose flavor. They might still be safe if the seal is intact and they were processed correctly, but the risk of seal failure or degradation goes up over time.
Off-Grid and Traditional Food Storage Methods
Not everyone has a fully modern pantry with climate control – many homesteaders and off-grid families rely on traditional storage methods that don’t require electricity. These methods, used correctly, can extend the life of foods naturally.
Root Cellars (Cool Storage)
A root cellar is essentially using the earth to keep food cool. Whether it’s an actual underground cellar, a buried container, or a cool corner of a basement, the idea is to maintain a low, stable temperature and high humidity for storing produce. Traditionally, root cellars keep foods in the range of about 32–50°F (0–10°C) with humidity around 80-95% – conditions under which many root vegetables, apples, and cabbages can last for months.
To use a root cellar safely, only store produce that is free of rot (one bad potato can spoil the bunch). Don’t wash vegetables before storage – just brush off loose dirt, since too much water can encourage rot. Keep different foods separate if possible; some fruits like apples emit ethylene gas that can make potatoes sprout for instance.
Solar Dehydrators (Sun Drying)
Drying food using the sun is one of the oldest preservation methods. Solar dehydrators are simple devices (often DIY) that enhance sun drying by providing a tent or box that heats up and allows moisture to escape. For safe sun drying, climate matters: you need hot days (85°F or higher) with low humidity and good airflow. It’s generally recommended only for fruits in many cases, because high sugar and acid in fruits help prevent spoilage while drying.
Fermentation and Pickling
Another old method is fermenting foods (like making sauerkraut, pickles, yogurt, etc.). Fermentation can be a form of preservation because beneficial bacteria create acids or alcohol that suppress harmful microbes. For example, fermenting cabbage into sauerkraut can preserve it for months in cool storage.
However, fermentation needs careful practice: use tested recipes and the correct salt concentrations if pickling. Also, in an off-grid scenario, fermented foods should still ideally be stored cool (cellar or fridge) to slow fermentation once it’s at a good stage.
Inspecting and Using Stored Food Safely
When it comes time to use your stored food, how do you make sure it’s safe? The last thing you want in an emergency is to get sick from the very food you were counting on. That’s why it’s crucial to inspect food before consuming it. Use your senses and some basic guidelines to judge safety, and when in doubt, throw it out.
Canned Goods (commercial or home-canned)
Before opening, look at the can or jar. No leaks, bulges, or severe dents should be present. A bulging lid on a jar or swollen can is a huge red flag for botulism – do not open or taste it. If a jar’s seal has popped (the lid moves when pressed), or if you see gas bubbles rising inside or seepage under the lid, that’s spoilage.
Upon opening, observe the appearance and smell. Never sniff directly if the can was suspect – just gently waft it. Any foul, rancid, or “wrong” odor means discard the food. Also look at the texture of the contents: things like milky or slimy liquid in a can of vegetables (that should normally have clear brine) is a bad sign.
Dry Goods (grains, flours, etc.)
Check for insects or droppings. Pouring stuff out onto a light-colored tray can help you see any bugs. Look for mold (which would appear if the item got damp). Smell the product – rancid or sour smell indicates spoilage (rancid fats or mold growth).
Jerky and Dry Meats
For home-dried meats or bought jerky, check for mold spots (sometimes appear as white/green fuzzy patches – definitely toss if present). Also, an overly greasy feel or strong rancid odor means the fat in it has spoiled – best to discard.
Freeze-Dried Foods
These usually show spoilage by either turning soft (if they absorbed moisture) or by visible mold if they got wet. If a package was compromised and air got in, after some time you might see discoloration or smell stale odors when rehydrating.
Emergency Food Storage Safety Checklist
- Store in a Cool, Dry, Dark Place: Aim for storage temperatures between 40°F and 70°F in a low-humidity environment. Avoid exposure to heat (above ~85°F) and direct sunlight.
- Use Proper Containers: Keep all foods in air-tight, moisture-proof containers to prevent contamination by moisture, air, or pests. Use food-grade buckets, sealed jars, Mylar bags, or cans for bulk items.
- Prevent Pest Infestations: Protect your stock from rodents and insects. Use metal or thick plastic bins that mice can’t chew through. Consider oxygen absorbers or freezing items to kill insect eggs.
- Rotate Your Stock: Practice FIFO – First In, First Out. Label foods with dates and rotate regularly so nothing stays too far past its prime.
- Don’t Mix Food with Chemicals: Store food supplies separately from household chemicals, fuels, paints, or other toxic substances.
- Cook and Reheat Safely: When using stored food, cook it to proper temperatures. Boil dried beans well (which also removes any potential toxins from beans like kidney bean lectin).
- Use Safe Water: Ensure water used for cooking, rehydrating, or rinsing foods is purified. In disasters, boil or treat water before mixing it with your food storage.
- Inspect Before Eating: Always examine food for spoilage signs prior to cooking or consuming. For cans/jars: no bulges, leaks, or bad smells. For dry goods: no mold, bugs, or off odors.
- Keep Clean Hands and Tools: In an emergency, still enforce basic food hygiene. Wash hands before handling food. Use clean utensils and knives.
- Watch the “Danger Zone”: Remember that perishable foods shouldn’t sit between 40°F and 140°F for more than 2 hours (or >1 hour if above 90°F).
Following this checklist will go a long way toward ensuring your emergency food supply remains safe to eat when you need it most. Being prepared isn’t just about stockpiling food – it’s about storing it wisely and handling it safely. With the right practices, you can feed your family in tough times without worrying that the cure (food) might be worse than the problem (hunger).
Grab a handy printable version of this checklist here (no signup required)
References
- About Food Safety – Centers for Disease Control and Prevention (CDC)
- Food Safety in a Disaster or Emergency – FoodSafety.gov (HHS)
- Shelf-Stable Food Safety – USDA Food Safety and Inspection Service (FSIS)
- Before You Toss Food, Wait. Check It Out! – USDA Blog
- National Botulism Surveillance – CDC
- Preparing an Emergency Food Supply, Long Term Food Storage – University of Georgia Extension
- Freeze-drying food – University of Minnesota Extension
- Shelf Life – Thrive Life
- Types of Root Cellars and Storage Tips – The Old Farmer’s Almanac
- Dehydration – UC Agriculture and Natural Resources
- Get the Facts about Salmonella – FDA
- About Listeria Infection – CDC
- Genomic Characterization of Escherichia coli O157 – CDC Emerging Infectious Diseases Journal

James is a former logistics coordinator and wilderness safety instructor, whose practical experience taught him the value of sensible preparedness and calm resilience. Passionate about self-reliance, James teaches everyday skills—like water purification, emergency communication, and outdoor safety—to help people confidently handle life's disruptions without fear or overwhelm. His approachable style combines real-world insights with relatable, personal stories and experiences.